Hello Again! Thank you for visiting! I’m super excited about the August block. I hope you like it as much as I enjoyed designing it. You’ll see that I had to work through a few ideas. I’ll show you photos and tell you why I didn’t make more of that particular block. In the “kitchen sink” quilt, those blocks will definitely go in. The oops blocks for the pink and green quilt may or may not go in. If they don’t I’ll chop them and add them to scrambles, so they are not added to the scrap bins. Let’s get going–we have blocks to make!
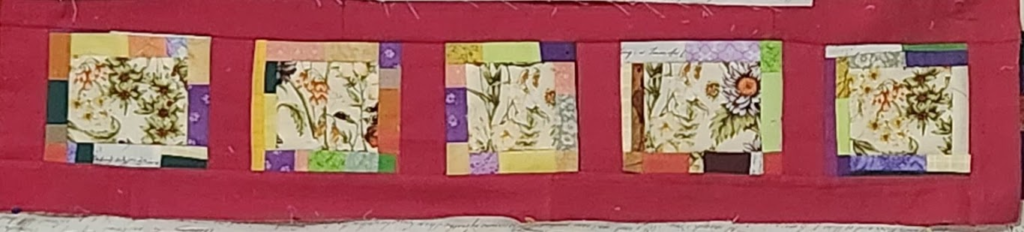
My first attempt–the print in the middle fades into the first round of strips.
This block can be as easy or involved as you’d like. It’s also a good way to use up those weirdly shaped pieces of scraps. There can be some issues, for example I made blocks that blended into themselves. This means that you need to use color to distinguish the sections or parts. Just keep that need in mind as you choose fabrics.
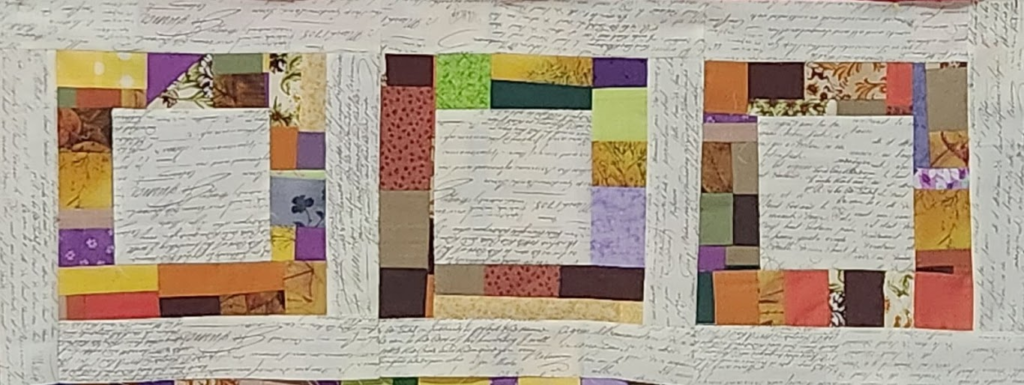
Another attempt, using the same fabric for the center and final round. I’m not crazy about it.
Decisions to make: How many blocks you need for your row will depend on the size of your blocks and the type of improve quilt you’re making. If you’re making a row quilt, you can do this in your sleep. A “kitchen sink” quilt means you can just stop at any point–make 3 or make 10. It’s your quilt, after all!
First, choose your colors. Have you been adding new fabric scraps each month? Something to keep in mind is that the width of the insert strips widely changes the size of the block.
If you want your blocks to all be the same size but look more improv-ish, trim them down after making the set. Just think about what will happen before you decide on a variety of widths.
Rotary cutting from yardage/fat quarters: By this time, you probably have everything you need for the block. Once you decide on the size of your strips, cut them from scraps or yardage, or cut them from left over scrambles or scrap blocks. You’ll see how I used those in a minute.
Cutting from pre-cuts: Other than pre-cut strips, there really is no reason to use precuts. Save those for a later block or project.
Chain piecing: This is an easily chain-pieced block. Just gather your pieces and strips and go to town!
Pressing: Press as you go.
Recutting: There may be some recutting to square up the final block, especially for the row quilt.
Finishing: Though it feels difficult at first, this block consists of straight lines. Even the cleanup was straightforward.
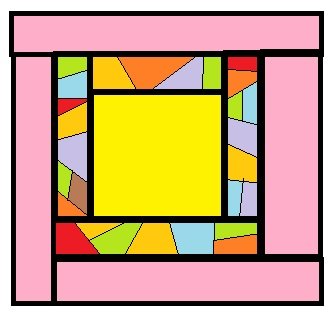
To create this block, you begin with a center square of any size as long as it’s relatively square. Add a second row using strips cut from scrambles or blocks you won’t use. I cut my strips 2 1/2 inches, but you can use whatever width you prefer. Keep in mind how large your block will be at the end. Now add another round of strips. I tried using a print but it got lost in the block, so I recommend a solid. It gives a more complete separation of the blocks. And that’s it. Basically, you’re using a log cabin method, except you don’t need to worry about the order of the strips.
I used scraps of HSTs, only to discover that the block looks quite traditional. Oops!
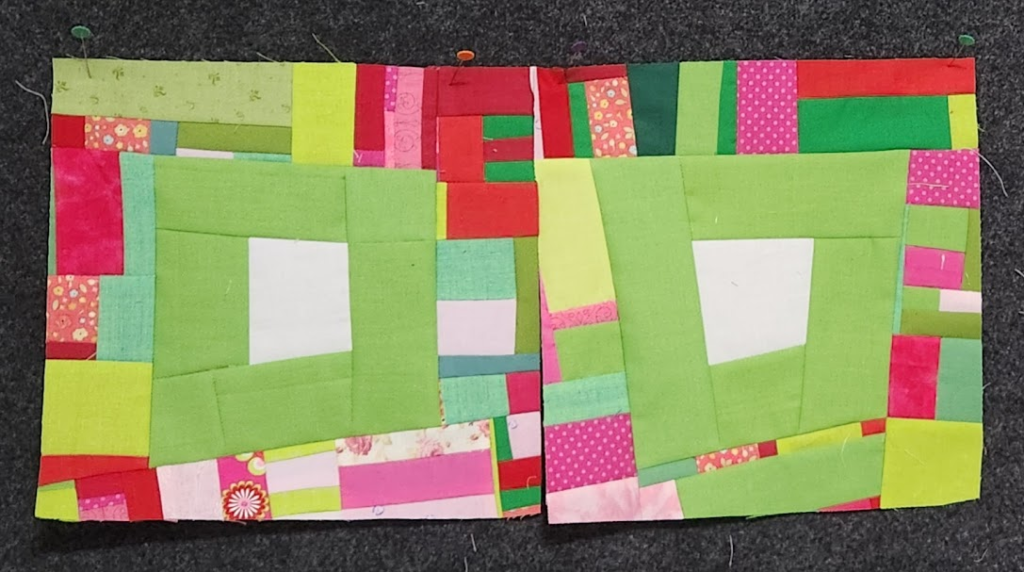
Because there were a few pieces of oddly shaped white fabric. I considered squaring them up, but of course I had to play with the odd shapes. In the end I discovered that this uses up quite a bit of fabric, but also creates scraps. I gave myself permission to toss these scraps. However, don’t you know that I love these blocks! I may make more and purposely waste scraps and strips. Hmm, what do you think of that? Would you do the same?
The process is the same as above, except that the last round will need wide strips. If you discover that your strips are not wide enough to square up the block (that’s the next step) add another strip on one or two sides as I did in the second drawing above. After the block is sewn together, use a square ruler, or a long ruler, to square up the block. Take your time here and make sure that there is fabric under all four corners. It’s easy to miss a corner, but you just need to recut the block. Of course, that means your block will not be the size of the ruler. If that’s important, you can sew a scrap in the corner then square that corner up.
For the pink and green quilt. I reversed the first and second rounds, so I may have to add a third one of solids. Regardless these are some of my favorite so far.
Of course, there are a myriad of ways to create the August block. Feel free to change the directions to make a block that’s more conducive to your needs. Have fun playing with the order of rows and the colors. Don’t forget to share your blocks on our Facebook group.
SIDENOTE: I cancelled the plans for a quilt retreat, which I have been working on for months, so I’m terribly disappointed. But a hurricane anywhere near the Gulf is not the time for people who must fly TO Louisiana. (And away from the safety of their homes.) After several concerned calls, I decided to cancel, and Valerie is returning monies this week. Perhaps at another time it will work. Of course, I am using the experience as a lesson in retreats, customer service, and advertising. (I was on live TV twice for the first time.) I also made a good friend with Valerie and met other quilters. So not all was a total loss. In fact, it was a win in many ways.
Here are the previous blocks for each month. If you’re just joining us, welcome to improv! If you’re catching up (life can get in the way) take your time. The blocks will be up until January 2025.
1 thought on “Improv Block of the Month — August’s Box in a Box”
Sandy
I like this block, Mary. It’s easy, but I played around with different colorways using my scraps. Your site was crazy broken earlier. Glad to see It’s back in business.
Sandy


I like this block, Mary. It’s easy, but I played around with different colorways using my scraps. Your site was crazy broken earlier. Glad to see It’s back in business.
Sandy