
Hi again! Welcome to the Improv Block of the Month for January! Surprise! This post is a little early. It’s our first month, so we may have a few issues to iron out. Please let me know if something confuses you. I begin with an overview of what you’ll do, then give detailed information. If you understand in one read-through, great. If you need lots of details, don’t give up. Just keep reading. It gets clearer and easier as you go along. Plus, I’m here to help you. Write your question/issue in the comments or shoot an email to info@marymarcotte.com. And finally, you can sign up for early access here. (It’s still free!)
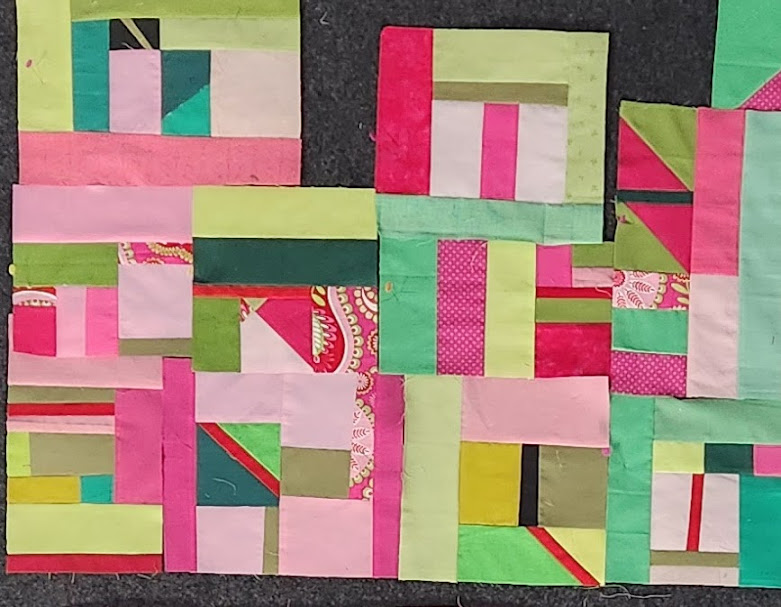
Making and Using Scramble Blocks Scrambles are the blocks you create by sewing scraps together. If you sew enough scraps into one block, it will become quite large. You’re turning scraps into fabric! Scrambles are as versatile as regular fabric. They can be used in several ways: 1. scattered anywhere on the quilt, 2. kept together to create one large-scale block, 3. sized to fit in an open area, or 4. used in other blocks. I find I never have enough, yet end up with extra after every quilt! Make as many as you want or can. It’s your quilt, after all. You can find more information in this post: From Scraps to Scrambles: Three Ways.
A quick reminder that I’ll use this format to write the overall directions. If you need help understanding my directions, check out this post.
- Decisions to make: The main decisions you’ll need to consider as you work on this month’s assignment are color, shape, and size. What is your color scheme? Have you sorted your scraps by color and size? Which shapes are you hoping to get–squares or rectangles? Does it matter? Can you see the overall idea in your mind and translate it into creating bigger and bigger blocks?
- Rotary cutting
- Scraps and strips: You will eventually use some strips, so subcut them only if you need crumbs and swatches. (Using scraps will save you time and money.)
- Yardage/fat quarters: Cut cabbages and strips from the fat quarters if needed, but try to use scraps before you cut. Subcut cabbages into swatches but not much smaller. It burns up time!
- Cutting from pre-cuts: Depending on your pre-cuts, consider cutting large pieces down to cabbage size, 10″ layer cake in halves or fourths. Strips into swatches. You’re shooting for 5-8″ pieces.
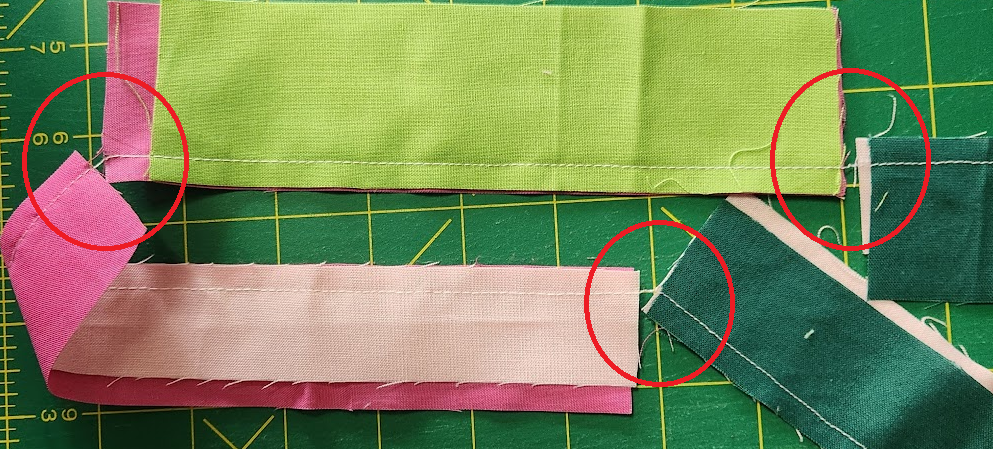
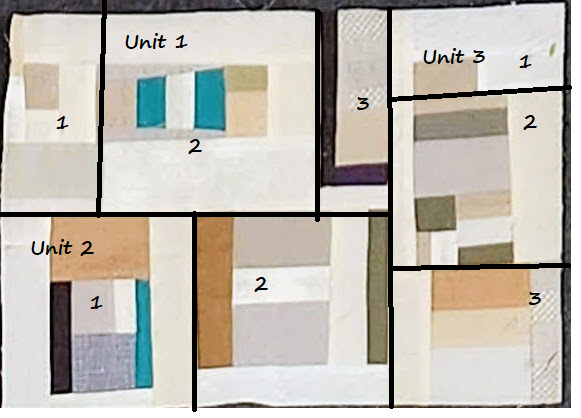
- Chain piecing: Sewing units of fabric one after another in one continous length of thread without stopping to cut the units apart. (See photo 1 below)
- Pressing: After chain piecing a pile of crumbs, take them to the iron, snip apart, and press to the darker side.
- Recutting: Trimming or cleaning up your blocks. Some improv quilters use their scissors only, others use the rotary cutter without rulers. I use all the tools at my disposal, so I cut the four sides of my units straight using my rotary and rulers. Super fast and easy. Any cut-offs that are big enough, go into the scrap bin to be used later. (See photo 2 below)
- Piece, press, cut, repeat! Until you run out of scraps! lol
- Finishing: I tend to make many blocks usually around 12″. I end with straight edges on all sides. When I have made about all the scramble blocks I can handle in one sitting, I put everything aside and clean up. The floor gets messy because I trim at the machine, the pressing station, and the cutting area. I try to keep the little slivers of trash contained, but they do have a mind of their own. So I dust the surfaces and sweep up the trash. I also put the pieces on the design board to take quick peeks at the blocks. Those peeks help keep the quilt in my mind to percolate while I’m away.


The details and definitions and probably TMI
To begin this quilt we are going to use scraps to build “scramble blocks.” If you saw my post a few days ago on three ways to sew “scramble pieces,” you may have already given this concept a try. Today we’ll cover the first one with more detailed information and examples. Also, you may find helpful information about my process from this post that I wrote after finishing “Citrus Sherbert.”
If you have decided to use yardage for your quilt, you can cut strips of different sizes and sub-cut those into squares and rectangles. Try to keep your pieces to about 5-8 inches square or rectangular. Of course, it seems counterintuitive to do this, but you’ll get the experience of creating fabric from scraps, which is a common concept in improv piecing.
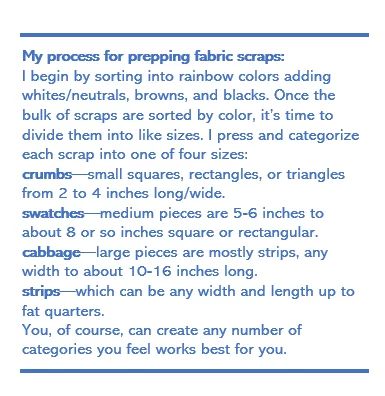
Sorting scraps If you’ve already pressed and sorted, skip down to the next paragraph. If not, let’s get your work into manageable parts. Pull your scraps out and begin pressing and sorting them. I make four piles of scraps. (You can make as many as you feel you need.) Crumbs are the small squares, rectangles, or triangles from 2 to 4 inches; swatches, the next size, are 5-8 inches square or rectangular; large pieces, called cabbages, are any width to about 10-18 inches long; finally, the strips can be any width but are often cut from fat quarters (22″) or the width of fabric (wof) (44″). This is my system, if you have a system you like, go with it.
Chain piecing Once everything is pressed and sorted, take the pile of crumbs, or smallest pieces, to your machine and just zip them under the needle. I try to match shapes and sizes, but I’m not too particular. The larger pieces can be trimmed down to match smaller pieces. Plus, you’ll add another piece or two as soon as you sew up that pile. I like to press my fabric all at one time, so I chain piece as many as possible and then take the whole chain to the pressing station.
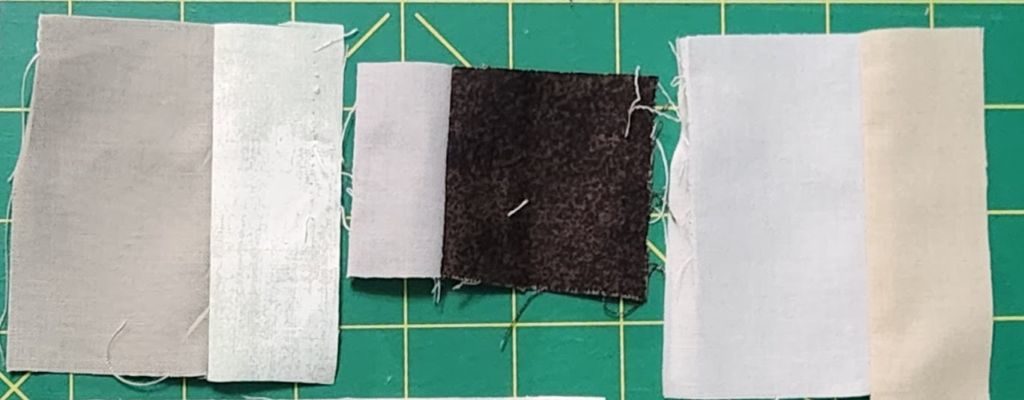
Pressing I snip the crumbs apart and press the seam to the darker side. It takes a while but is a yen-like chore.

Recutting or trimming At this point you can square up the pieces. I usually trim the two sewn side to even them out. Sometimes I use scissors, and other times it’s the rotary cutter. Simply use the one you prefer.
Chain piecing Now it’s back to the machine with all those two-piece crumb units and the swatches. For greater variety, I sew two-piece crumbs to other two-piece crumbs, AND I sew some to larger pieces to create a three-piece unit. By the time I get back to the pressing board, I may have any number of pieces in a unit because I occasionally cut an edge to straighten while at the machine and sew medium pieces to opposite sides of a unit giving me a four-piece unit. Honestly, there’s no rhyme or reason. I just sew and can keep going like this for hours–sewing units together.
Recutting Straighten edges, one or two or all four sides. I usually trim the sewn sides. I sometimes snip a few smaller pieces while I’m at the machine and add to them before pressing and recutting.

Repeate sew, press, recut, repeat. You just sew and sew and sew. (Doesn’t that sound fabulous?) Eventually, as you add to pieces and sew units together, you’ll have pieces that are relatively large. At this point, I press and trim the four sides using the rotary cutter. The number you need will depend on how large you want the quilt to be and large you make your scramble pieces. I figure out the average size of my scrambles, then determine how many I’ll need based on the quilt size I want. I ALWAYS make one or two extra scrambles because I use a few in other blocks and to fill in spaces when I’m putting the quilt together.
Remember to post photos on Facebook and/or on Instagram using the hashtag: #improvbom24
Other pages you might find helpful:
Choosing Fabrics
Fabric Yardage
Directions Definitions
Grab a Badge

Looks like fun! I’ll give it a try.
Wonderful! I’ll add your name to my list of users so you’ll get email notices when a new class is available. I can’t wait to see what you create!
Mary
Yes, I will want to participate in the improv block of the month. I have scraps ready to use. I’m looking forward to seeing how my blocks turn out.
Thank you.
Thank you and welcome! I’m looking forward to seeing those blocks also. And for me especially, getting your feedback on my directions. Let’s have fun!
Your pieces look like Modern Abstract Art to me…very beautiful in the solids. I’m using scraps for the Bramble Bloom QAL and will watch and learn from you Mary as you work through this process. Thanks for the wonderful explanations.
Well, thank you, Jocelyn! That’s a compliment, indeed! I’m looking forward to seeing your first piece on our Facebook page or Instagram. The tag is #improvbom2024