Welcome back to our Improv BoM! This month we’re making dots to float across your quilt. If you arrange the quilt in rows, one row will be the dots. If you’re arranging the quilt in some other form, you can scatter individual dots or a cluster of dots throughout the top. I’ll show you two ways to make your floating dots. The first way uses a skinny from the March BoM, and the second way uses small squares sewn into the corners of patches. You can use either method to create perfectly square dots or improvisational ones.
Decisions to make: Will you have enough fabric for the whole quilt? Now is a good time to assess that. If you add another color that matches your color scheme, it will be easy to sprinkle the new color around the quilt. You will need one or two skinnies for this exercise, so you can use one of the skinnies you’ve already made and put new skinnies (using the new fabrics) in the March row. This will sprinkle both the older fabric and the newer fabric. An important consideration is that for the dots to appear to “float,” the background fabric needs to be the same (or a close match) for all of the blocks, especially if you are placing them in a row.
Rotary cutting
Scraps and strips: Anything that will create a skinny will work. Dots don’t have to float in a straight line.
Yardage/fat quarters: Again, anything you need to make a few skinnies.
Cutting from pre-cuts: You can use 5 1/2″ or 10 1/2″ precuts because you’ll be subcutting them anyway.
Chain piecing: This is a great time to practice chain piecing.
Pressing: Press as you go, especially for Option 2.
Recutting: Once your skinny is sewn, you’ll be cutting the strip into 1 1/2 units. To make handling small pieces easier, sew the third strip in place BEFORE cutting the skinny unit. (You can do this with each block.)
Piece, press, cut, repeat!
Finishing: The number of dot squares you need will depend on the widths of your blocks and your quilt if you’re arranging rows. Otherwise, make to your heart’s content.
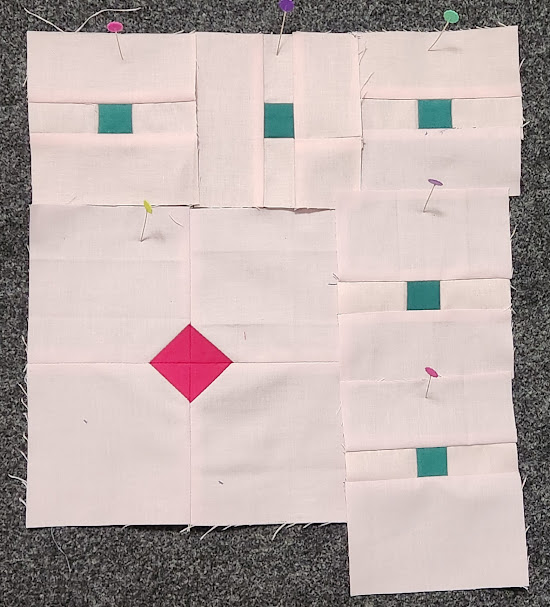
My first six improv floating dots. I measured the pieces for most of these squares but the two green dots in the lower right corner have sides that were not measured and so are wider than the others. Also, note that the second option for making the dots has them on point. I’m planning to make more of them and just mix everything up!
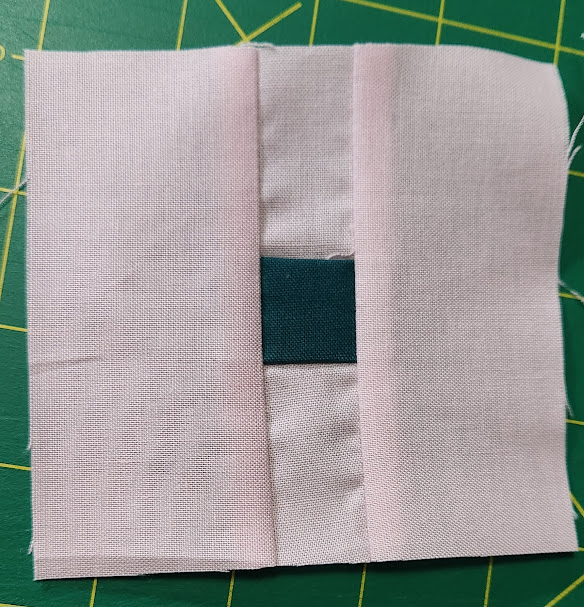
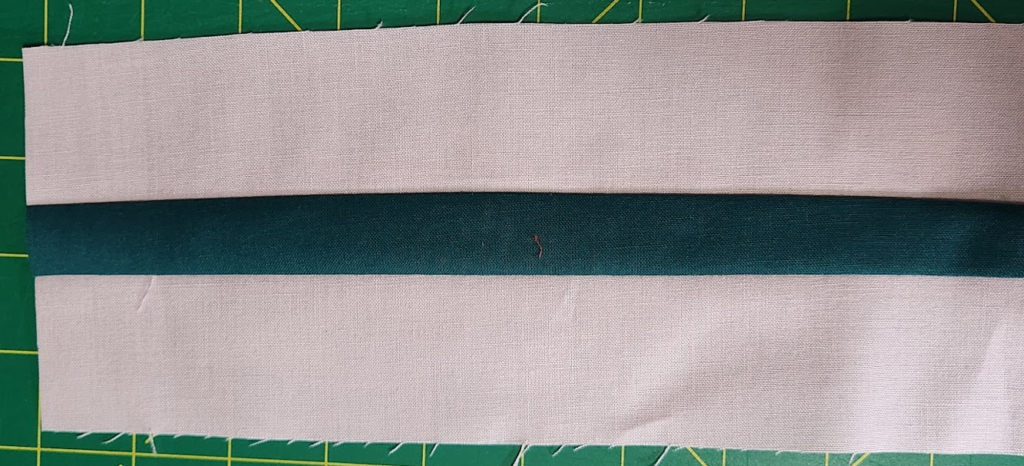
Option 1
Measurements for this skinny: green 1 1/4″ wide X 8″ long; pink strips are 2 1/2″ wide X 8″ long.
If you’re using my measurements for this dot block you need three pieces: a skinny, and two additional pink pieces that measure 2 1/2″ wide by 5 1/4″ long. Because my dots are especially small at 3/4″ square, I use this system to stabilize the block while working on it. Sew one of the pink strips to the short side of the skinny and press the seam away from the skinny. Now cut the skinny block 1″ from the seam. Sew the final strip onto the open side of the skinny. Conversely, you can sub-cut the skinny piece into 1 1/2″ pieces and chain piece the sides.
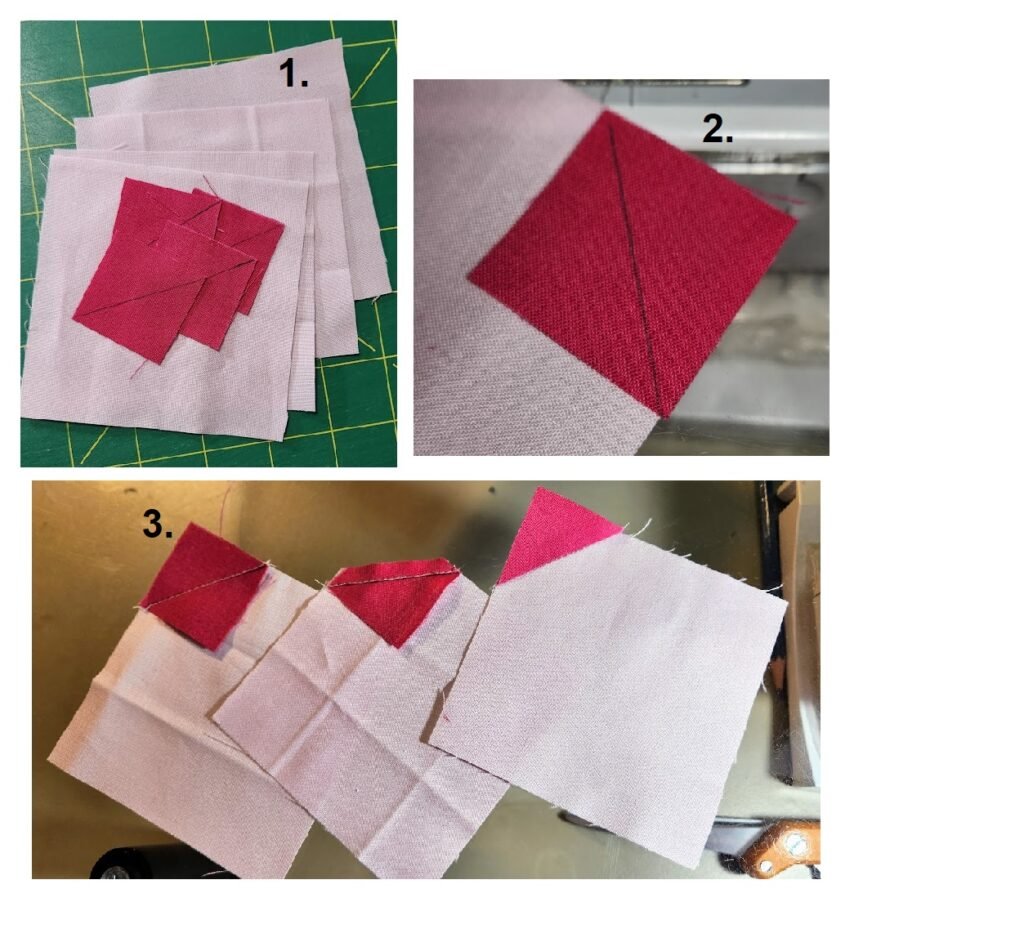
Option 2
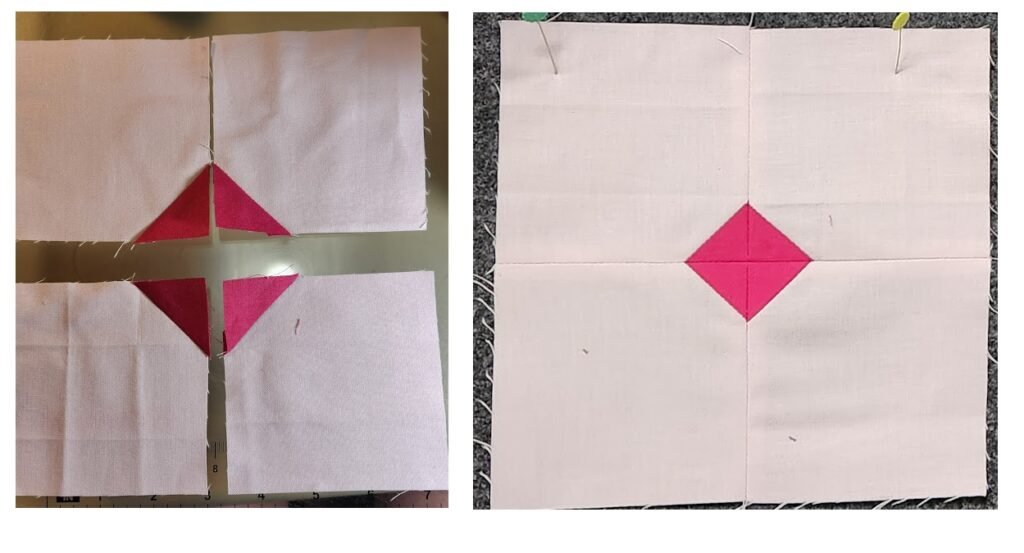
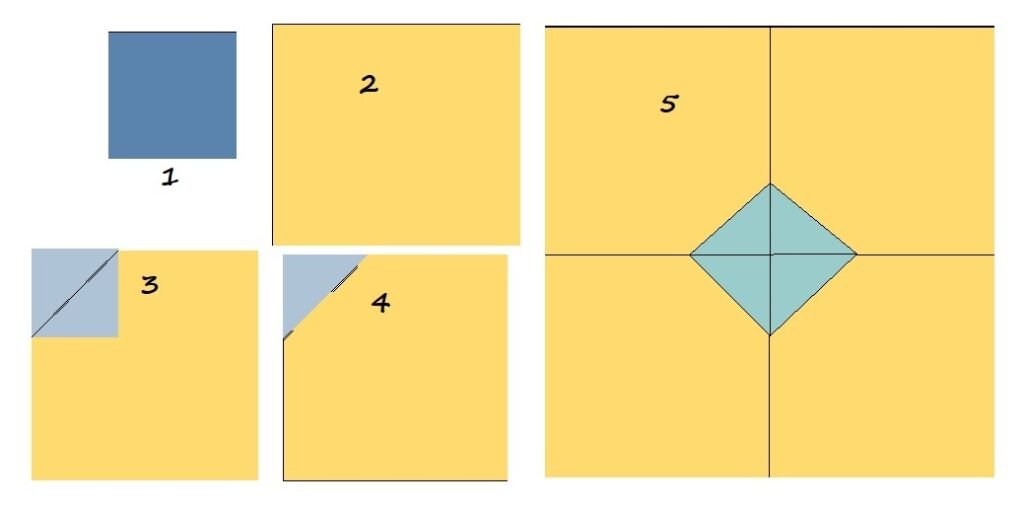
For these 6″ blocks, you need four background squares 3 1/2″ and four dot-colored squares 1 1/2″ wide (1). (You can, however, change the size of the background squares.) Draw a diagonal on the small square, from point to point. Place the small square on the corner of a large square so the edges and one corner line up. The diagonal should be perpendicular to the point (2). Sew, trim off the excess, and press (3).
Now, matching up the points, sew two sets of patches together. Then sew those patches together. The four points should match up to create a small square in a larger block. Once you understand how the block is put together, you can play to your heart’s content. Use different-sized squares and trim them up at the end, or not. Instead of trimming blocks down, you can always size them up by adding another background piece where needed.
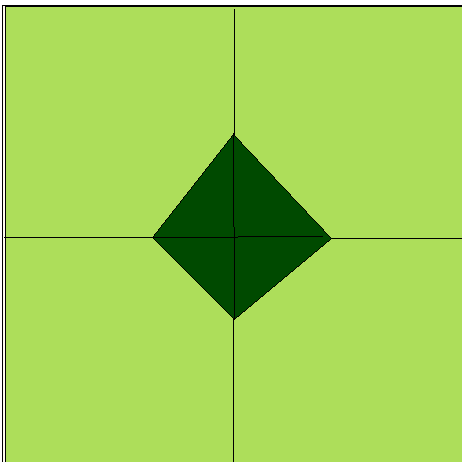
Use improv with different-sized small squares to give you a wonky block similiar to this.