Hello! Welcome to Improv Block of the Month! I know it’s not January, yet, but some followers are itching to get started. This post is what we call “lagniappe” in Louisiana French, which means something extra. I hope you enjoy it. If you are just joining us, you might want to look at this post, which is an overview of the plan. This post explains Mary’s lesson plans.

I have all sorts of names for blocks. Fun, quirky names to help people remember the block idea. This block is called “Scramble Pieces” because putting all the scraps in one block is a bit like scrambling eggs. You do a lot of mixing and, in the end, it looks different, but they are still eggs. Making a scramble piece is not difficult, per se. It’s more that you have to keep going, and the more you mix things up, the more interesting your piece becomes.

Let’s just jump into “Scramble Pieces.” They have no rhyme or reason. You just sew crumbs to other crumbs to swatches to cabbages to strips. Then you repeat the process until all or most of the scraps are in block pieces. See, all the scraps. Believe me, they get all scrambled up while sitting on your sewing table (or the floor). I have three basic ways of putting these pieces together.

1. Chain Piecing. This is basically what you do in traditional piecing when you sew together blocks that have many, many of the same pieces that go together. Those directions look something like: “Sew the 1.5″ red piece to the 1.5″ blue piece. Repeat the process until you have all 124 red/blue blocks.” You just sew and sew and sew, without cutting your thread because that would slow you down. You’ll do the same here except YOU decide which pieces go together. Step One: sew your small pieces, or crumbs, together based on size, no matter the color, shape, size, or type. Just sew till you have sewn all the little crumbs. Step Two: snip them apart and press them open with the seam to the darker fabric. Straighten the jagged edges. (Now is a good time to stand and move your body around.) Step Three: sew a two-piece crumb unit to another crumb unit. When all the units are behind your machine, snip and press. Again, straighten an edge or two. Of course, you can square up the pieces, but I don’t worry about that quite yet. Step Four: sew crumb units to swatches or cabbages. Snip them apart and press all seams. Do you get the idea? When you run out of those crazy little pieces… you’ve got scramble units that can go together until you have a block as large as you want or need. Doesn’t it look scrambled? There you go. You can continue to sew piece to piece or you can practice one of the other ways to scramble together fabric.

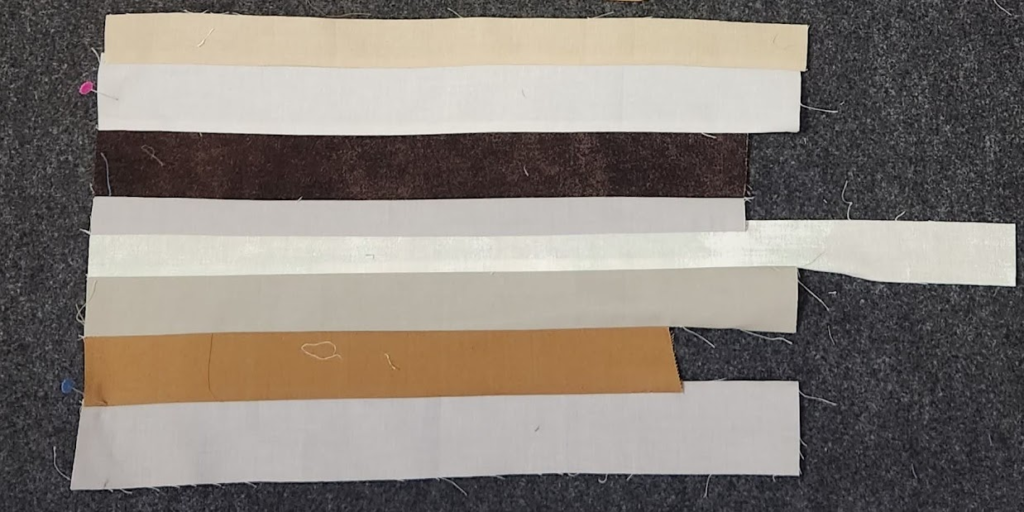
2. Piecing Strips. If you’re familiar with a jelly roll race, this is much the same. One way is to sew the long sides together and continue sewing strip to strip until you have a 10″ or so block. Press seams to one side and straighten out the piece. (The cut-offs go into the pile of small pieces.) Another way to handle strips is to match same-width strips and sew them on the short ends. You’ll get very long strips of varying widths. Press and cut them all about 12″. (Any length you’d like.) Now sew them together along the length. This method produces less waste to toss back into the scrap bins, but both ways work. I use both methods. Which do you prefer?

3. Mix It Up. I quickly tire of repetitive work. So I start out sewing crumbs to crumbs, then move them up a notch by either adding a swatch or cabbage. I often sew several units to one strip and then cut the strip piece so it will fit the unit. I may add strips to pieced units to increase the size quickly (like the one above). I just sew ADD style (yes, attention deficit). If you don’t enjoy ADD like I do, just take your time and sew the pieces together in whatever manner works best for you.

All of these units and pieces can be used in various ways. They can be stand-alone scramble pieces to add to the quilt as they are. They might get cut to create an interesting block or used just like fabric. I also sometimes sew a small border around a unit to make it stand out. I make it up as I go along, which I hope you’ll be doing at the end of this improv event.
Meanwhile, remember to grab the button above and post it to your blog or website. Please invite your friends, followers, and guild members to join us! The adage is true: the more the merrier!


