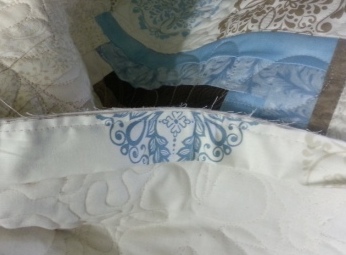
Follow these step-by-step directions to attach binding to your quilt completely by machine. These directions are updated from this Fleur de Lis Tutorial and can be used if you plan to hand-sew your binding to the back of the quilt by following the directions up to the section titled “Stitching the Front.” Just be sure to machine sew your binding on the front of your quilt.

Cutting and Pressing the Binding
Cut binding 2½ inches wide and as long as you will need to go around the circumference of the quilt. To determine the length of the binding, I measure the length and width of the quilt and add them together. Multiply this number by two and add 8 inches. (Let’s use 20″ X 25″ quilt as an example. Add 20 + 25 = 45; 45 X 2 = 90; so we’d need 90″ of binding). Press the binding before attaching by folding in half on the length with the wrong sides together (WST). Now clip the corners of the quilt so there’s less bulk within the mitered binding. Tip: if you use tags, pin or stitch one in place before you begin sewing the binding.
Sew the Binding to the Back
You will sew the binding on the back of the quilt so that later you’ll topstitch the front side of the binding. Pin the binding to the quilt along the edge beginning in the center of one side. Do not sew the first five inches of the binding. You will need this to attach to the opposite end of the binding later on. Sew along the first side until you reach the corner, stopping 1/4 inch from the corner (see photo 1 in the collage below).

Now remove the quilt from the machine. It’s not necessary to clip the threads; I’ve done that simply so they don’t show in the photo. Turn the binding up to form a 45 degree angle and place a pin in the binding to hold it in place (collage photo 2). Next turn the binding down on itself to lie along the right edge of the quilt (collage photo 3). Again, put pins in the binding so that it will stay in place as you move it back to the machine.
Begin this stitch 1/4 inch from the edge (collage photo 4). Backstitching is not necessary as you will make another seam later.

In the photo directly above, I’m holding the binding so that you can see how loosely it appears in the corner. This looseness is necessary to make a mitered corner on the opposite side. More on mitered corners in a bit.
Repeat the process as you attach binding completely around the quilt. When you get to the point at which you began, stop about 8 inches from the first stitch. You will need to measure and connect the binding ends to finish stitching it to the backside of the quilt.
Closing the Binding
First, remove the quilt from the machine and work on a flat surface. Lay the two binding ends down along the quilt edge so that the shorter one is on the bottom. Mark on the top piece exactly where the bottom piece reaches (see photo 1 in collage below) and measure from this line 2 1/2 inches of overlap, mark and cut on the second line that you drew (see photo in collage below). Note: this measurement must equal the width of your binding. If you use a narrower 2 1/4 inch binding, the measurement must match 2 1/4 inches.
Tip: Fold and pin the quilt (see photo 3) to keep it out of your way and make it easier to sew the binding. To do this, I simply pile or bunch up a short bit of quilt right between the already stitched pieces and stick a pin or two in to hold it. This way the quilt doesn’t pull the binding apart and work against me.

To sew the two ends together, match them with right sides together so that they form an L shape (photo 4). Tip: pinning the fabric this way will keep the pins out of your stitching path as you sew. Now draw a 45 degree line between the pins from corner to corner. Next, sew directly on the line from corner to corner. Important: Remove all the pins and open the binding after stitching to make sure it fits. If all is well, cut off the corner 1/4 inch from the seam, as in photo 6. Finger press the seam open, pin the binding in place and sew. Congratulations, the more difficult side is finished!
Stitching the Front
The front side of the binding is easier to attach. These directions are for attaching the binding by machine onto the front of the quilt. You can use decorative machine stitching or a simple topstitch as I did here. Now turn the quilt right side up. Roll the binding around to the front and pin every 2-3 inches. I use only about ten pins and, as I sew, I move the pins to the upcoming binding. You should start pinning in the center of one side and be sure to remove the pins as they get close to the needle. Sew until you are about four or five inches from your first corner. Stop with the needle down. It will work as a “third hand” to help hold the quilt.


Now leave the quilt on the machine with the needle down. Fold the bottom edge of the binding up as in the photo on the left and pin along the binding. Then fold the other edge over the first and pin like the photo on the right. As you finish the first side, the presser foot holds the next side down rather than having to “jump” onto the new seam.
Miter the corners
To get a nicely mitered corner, you may need to encourage the binding. I use my stiletto to fold the binding by pushing it into the corner. If the angle is off–it should be at 45 degrees–usually it’s because you need to push more fabric into the corner. (This is when clipping the corner pays off.) Still having a problem? Then check to make sure that you’ve pulled enough binding around from the back. You need a straight line before you can get a 45 degree corner. Now pin the corner just like in the photo on the right above and sew slowly.
As you sew, slide the pin out a little at a time and sew right behind the point as it moves. The final stitch should be just past the binding’s edge in the middle of the miter. Leave the needle down to turn the quilt. Sew slowly and make one or two stitches before removing the pin completely. Even better, slide the pin out slowly.

Ta Da! a beautifully mitered corner! To conclude, continue around the quilt to attach the binding, repeating these steps around each corner. Tip: Don’t forget your label! You should now have a beautifully bound quilt! Finally, credit goes to Michele D’Amore for her beautiful collection of Surf and Sand fabrics, which is from Marcus Brothers Textiles.
As always, thank you for visiting! You can find other updated and new tutorials here!


