Welcome! Welcome! It’s already May and we are into the quilt now. Sort of “the point of no return.” It means keep playing! So let’s play with half-square triangles and quarter-square triangles. These two blocks are so closely related, that I decided to include both this month. Make extra HSTs because you’ll need them for the QSTs.
HSTs for the pink quilt
Half Square Triangles (HSTs)
This block can seem complicated, but truthfully it isn’t. Two squares, two seams, one cut and a press–and suddenly there are TWO new blocks. Seriously, just like that. (snap fingers) What makes this block a bother is the math, but even I can do that. Decide what size block you want and add 7/8″. So, you want a 5″ block, you’ll start with a 5 7/8″ square.
Decisions to make: As you decide on the size of the block, keep in mind how it will affect the quilt. These blocks “show a lot of skin,” meaning the fabric stands out in comparison to scrambles and skinnies. Want to show off some fabric? Make large blocks. Or, make lots of little blocks that you can bunch together. Because we are making both HSTs and QSTs, you may decide to make enough of each for a full row.
Rotary cutting: You can cut same-sized squares from yardage or use squares already in your scraps without cutting them. Match the two pieces and press (1).
Pressing: I like to pair up the squares and press them right sides together. The fabrics sort of stick together and don’t shift as I sew.
Prepping: Now draw a diagonal line on the top square (2) and use it to sew on either side of the line (2).
Chain piecing: Chain piecing works well with this block. I prep several squares and chain piece them all at one time. Before sewing, place two squares RST and press. Draw a diagonal line, and sew 1/4″ from the line on both sides. (2). *The January instructions have lots of info on strip piecing.
Recutting: Cut the drawn line between the sitiches (3). Press the blocks toward the dark side. After I press the block flat, I decide whether it needs to be squared-up or trimmed. Because I use scraps, my blocks are rarely square.
Finishing: For the row quilt, I need to make sure I have enough blocks for the row. That’s starting to bother me. I have some rows that are 80+ inches and some that are 60ish inches. I’ll take the extra out of the longer rows and use them in future blocks. You may want to start thinking about the size of your quilt, as well.
HSTs for my second BoM quilt.Here are some HSTs that I made using uneven squares. I can use them as they are or trim them down to make them square. I’ll probably use them like this but who knows what I’ll do in the moment.
Quarter Square Triangles (QSTs)
Quarter Square Triangles are basically two HSTS resewn in opposite directions. Here we go. Make at least two HSTs (see above for directions).
The drawings show the bottom pieces sticking out just a bit so you can see how to place the patches. In reality, they should be stacked with all sides even.
Decisions to make: To begin you will need two half-square triangles to create two blocks. Do you have enough already? Will you make more as you go or knock that chore out first? Contrasting colors work best for this block. Assess your fabrics. Do you have enough? Remember, adding early in the process gives better results than waiting until you’re almost finished.
Rotary cutting: If you are making HSTs specifically for this block, follow the directions above.
Pressing: Pair up the squares, with opposite colors right sides together. Press (again) so the fabrics cling together and don’t shift during sewing (1).
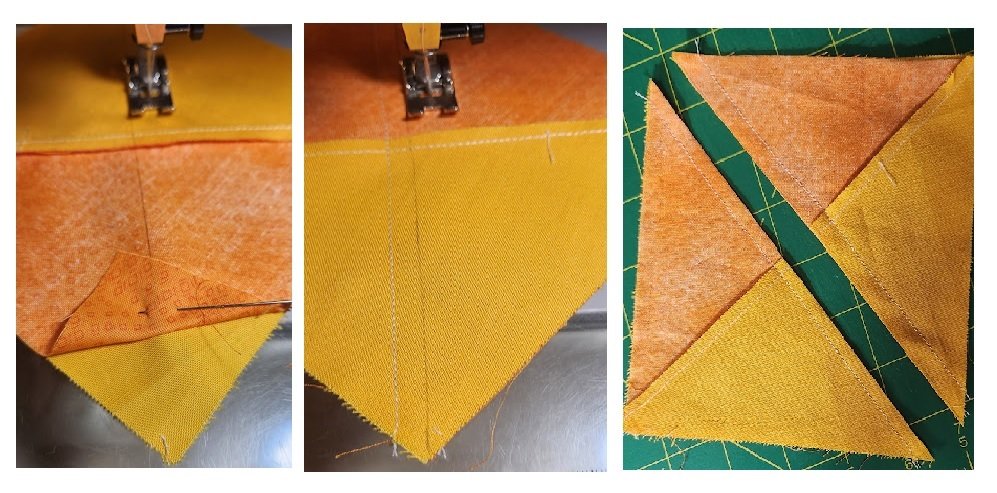
Prepping: Now draw a diagonal line on the top square (2) perpendicular to the seam.
Chain piecing: Sew 1/4″ away from both sides of the line (3). Chain piecing works saves time while sewing QSTs also. Prep several blocks. Then sew every block on one side of the line, turn the whole strip around and sew on the other side.
Recutting: Cut on the drawn line between the stitches (3). Open and press the two blocks. Now, decide whether they need to be squared up or trimmed. (I use scraps, so my blocks are usually not perfectly square. For me, squaring up is optional.)
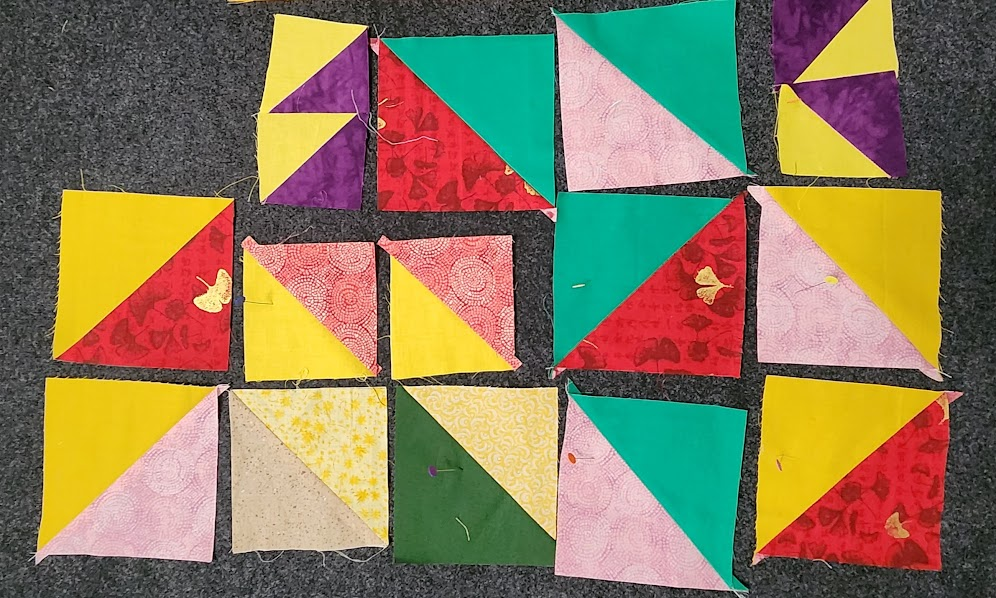
Finishing: Arranging blocks will come later, but now is a good time to put all of your blocks on the design wall just to check that you are making enough, especially if some are small. (Remember that seams affect size.) Play with your blocks on the design wall and take pictures just to get a sense of what you can do.
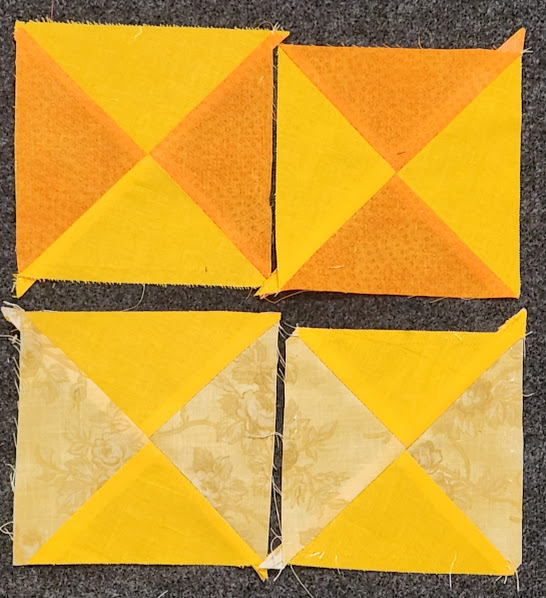
Notice how the QSTs look differently when turned 1/4 turn.
If you are making a row quilt, check that you have enough blocks for the entire row. Are you going to put both HSTs and QSTs on the same row? You could make two rows–one each of HSTs and QSTs!
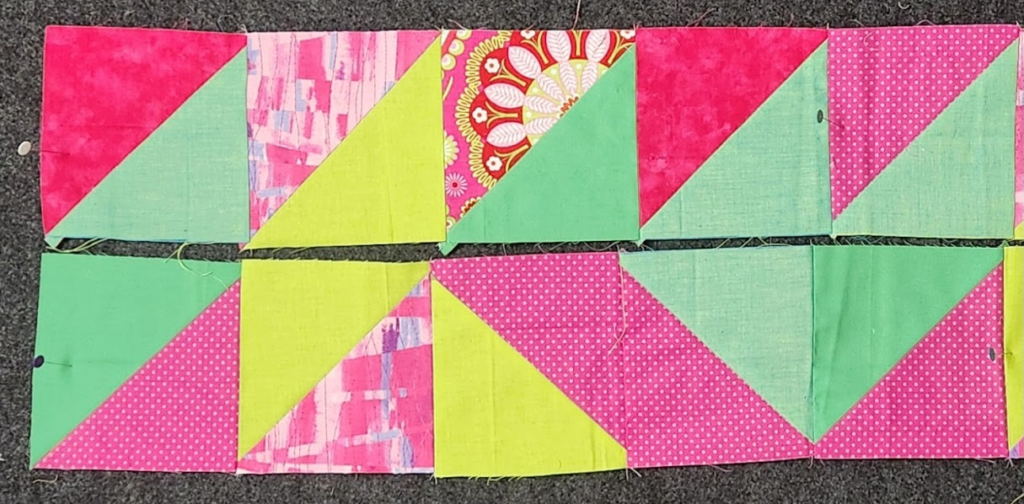
HSTs in a row as wide as the other rows. Notice how turning the HSTs changes the design.
If you are making a “kitchen-sink” quilt, you can make any number of blocks. I tend to make blocks based on the time I have. Yes, really. A whole day of sewing means I can produce lots of blocks. An hour or two means just a few blocks. Sometimes I come back to them, but most often, when I get back into the studio, I’m on to something new. That’s my “kitchen-sink” style–everything goes in, but I never know exactly what or how many that may be. My improv quilts are sort of living along with me from beginning to end. Of course, it’s living by the seat of my pants, but that makes life interesting!
Remember that you can leave questions and suggestions in the comments section or email me at info@marymarcotte.com. If you post anything to Instagram, please add the hashtag #improvbom24. Post photos of your blocks (from any month at any time) on our Facebook group. We want to see what you’ve created!
Just joining us? Click on the buttons below to find information on previous blocks: