Your cart is currently empty!
Tag: pinterest
-
How to Organize Fabric Scraps for Quilters
I spent Sunday afternoon cleaning up, putting away, and organizing in the sewing studio. It was unreasonably calming and refreshing, at the same time. You can’t imagine how much difference it has made. Anyway, I was well into the third pile of scraps and thought this mess could become a tutorial.
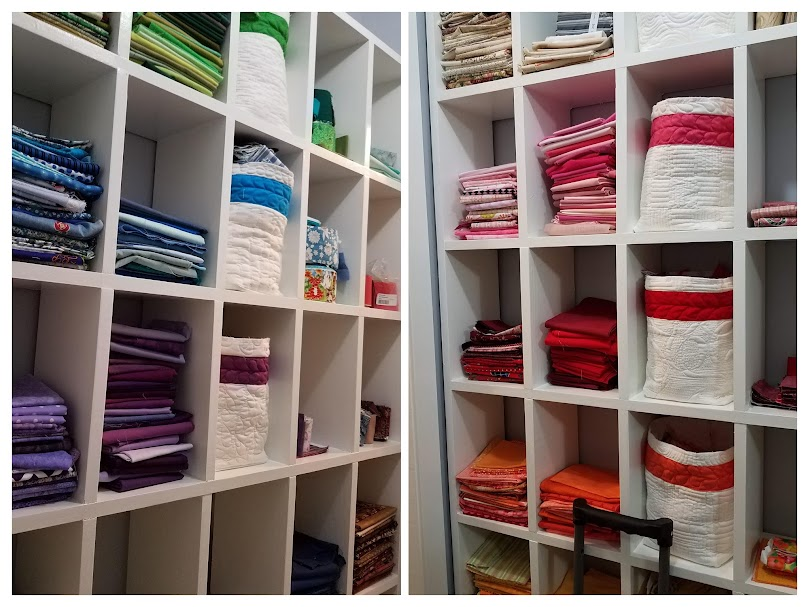
Bins in cubbies with fat quarters and precuts nearby. Oh, what a great organizational system. (If only it always looked this way.) So, here we are. Understand that there were several piles to organize. Much of it was in a basket that collected cut-offs, pieces of blocks–that I had spent hours searching for–rejects, and even a pair of small scissors that managed to work its way to the very bottom and rest there for what has probably been months. Ah, but now I’ve got you! And you will scissor!
The cast-offs from Ryder’s safari quilt created a second pile. This one I tossed into the trash. Pulled most of it out to use as test scraps. Then tossed into a different trash bin. I am likely going to play that game until Richard empties the bin. Let’s hope he doesn’t discover the pieces and think they are there by accident because he will set them aside. Oh, don’t think this pile was an easy fix. Tossing fabric is a serious quilt crime!
The third pile contained scraps from a sweet friend who appliques the most beautiful tops. She brought three small shopping bags, filled to the brim of gorgeous fabrics. Much of it Kaffe Fasset!
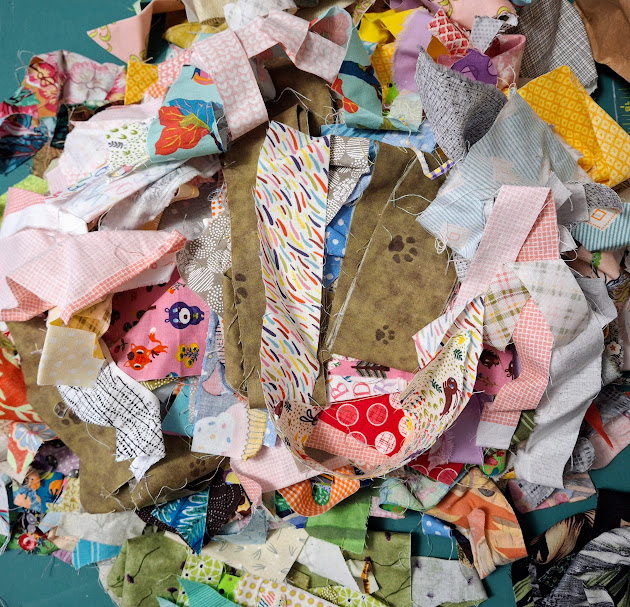
I like to dump the pile out of the container and spread it out. It’s easier to organize since I can see it better, but pieces can escape. Of course, I don’t mind. They show up again…usually when I sweep.

a pile of blues All of my scraps are organized by color (see the photo above). While I use rainbow order, I’ve added a few colors to the list. Currently, I have neutrals, pink, brown, and black in addition to roygbvi. Perhaps I should add a teal/turquoise bin, and split the neutrals to white and off-white.
I don’t worry with ironing because I always press scraps as I pull them for use. They get pushed and smushed as I add more to the bin, so they’ll be wrinkled no matter what I do while sorting.
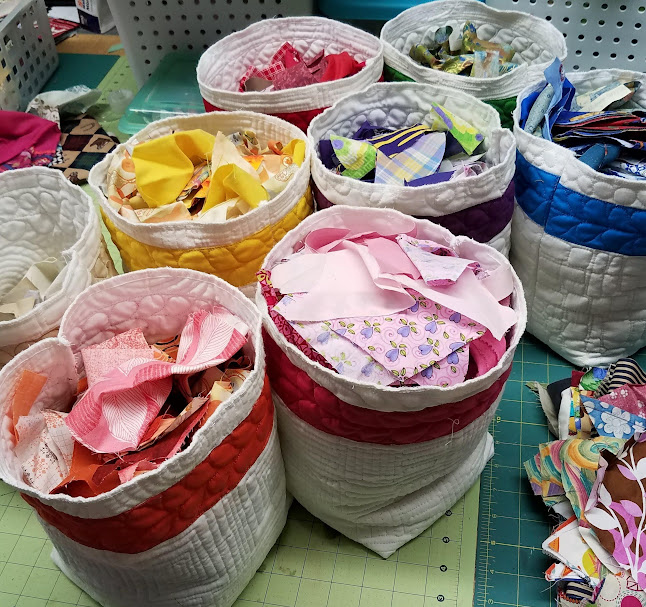
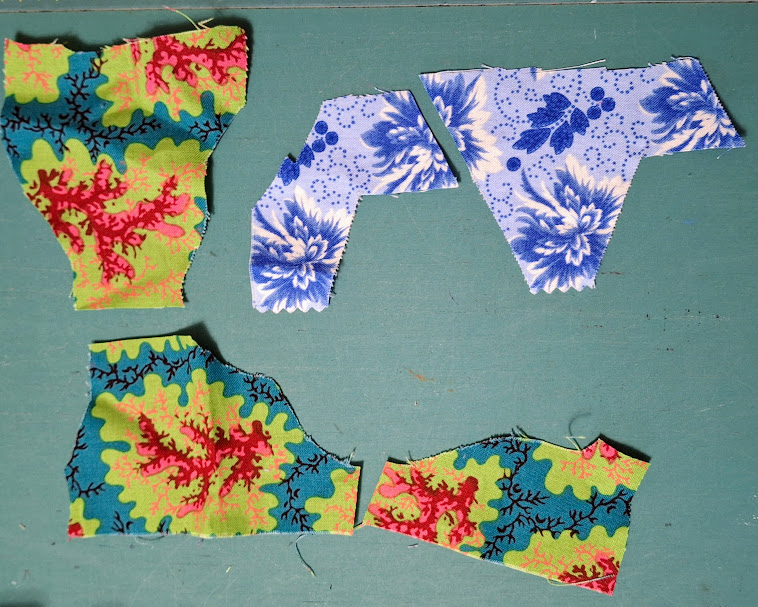
The bins I made years ago for the old studio are still working in this one! Prints with lots of colors have always been a organizational problem for me. Background colors have been the biggest factor in my decision-making. I’ve also tried to solve it by separating novelty fabrics into a separate theme, but that hasn’t helped. So now I take a different approach. I decide where a particular scrap should go based on color and use. For example, all four of the pieces below are children’s novelty and, obviously, the two on the right could go into the pink bin–though the one with the white background might also fit in a white group.
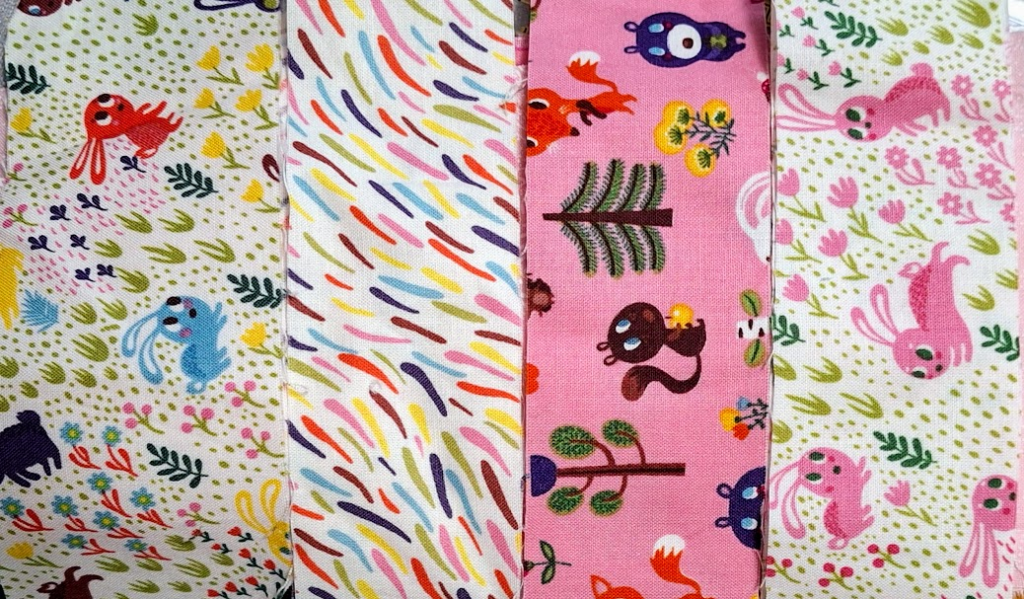
Where, oh where, do you go? The two on the left could also fit in a white group. In the end, however, I put all four in the pink group. The prints for all four give a childish, playful vibe. They all have some pink. I will likely use them in little girl quilts, and I use lots of pink in little girl quilts. Thus, chances are I’ll see them as I dig through the pinks.
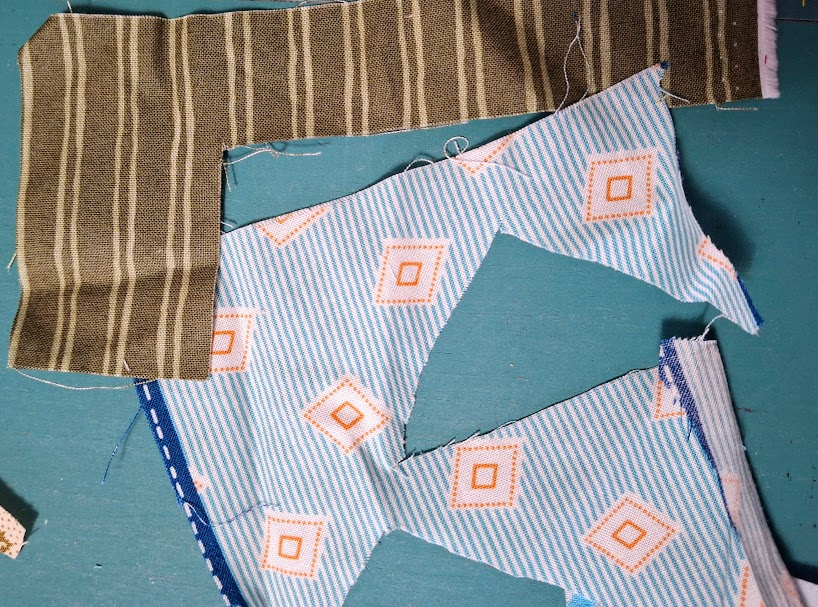
A question that people often ask is what do I do with oddly shaped pieces? Cut them into particular sizes/shapes? I do not cut scraps unless doing so clearly makes sense. I want my scraps to be as big as possible. Cutting them down when I use them is always an option. But there are instances. I cut the pieces in this photo for two reasons: they can’t be used as they are, and they’re messy in the bins.
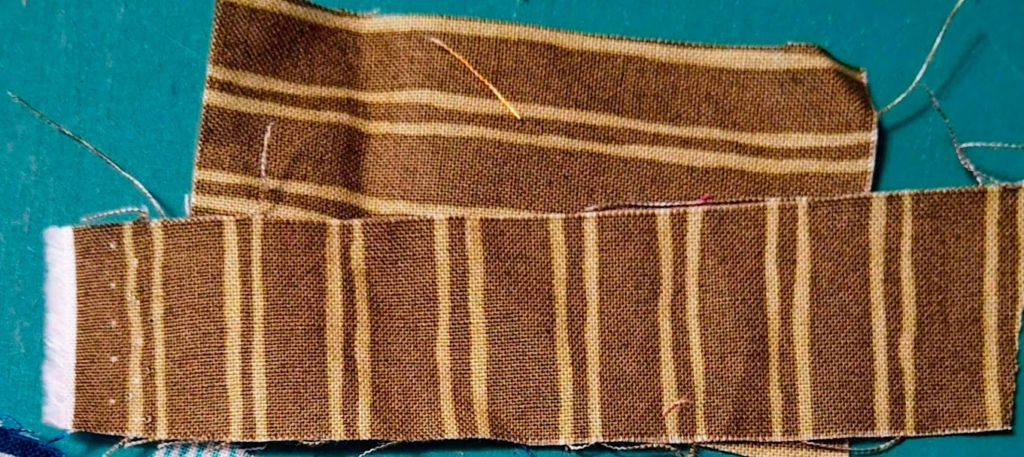
So, I cut the brown one into two pieces, keeping the wider section as large as possible. The blue I cut into three pieces, angling the cuts so that I was able to keep the triangular shapes. They certainly aren’t perfect triangles, but I can work with them from this point forward.
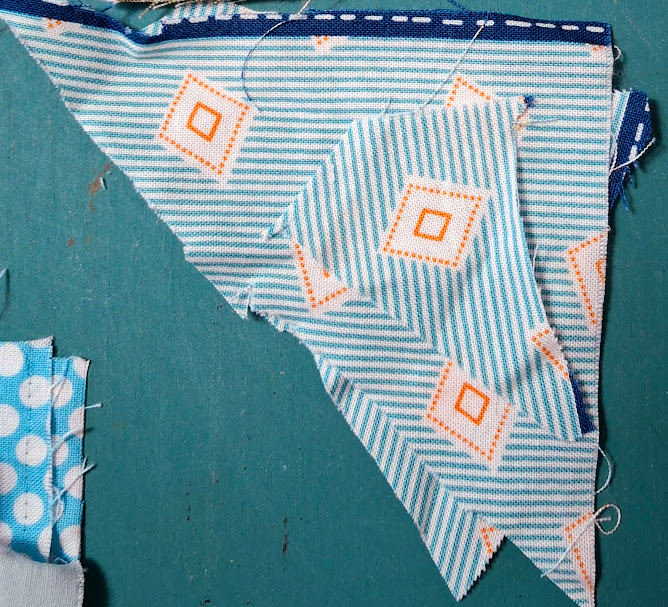
Two more strange pieces to figure out how to handle. Here they are below. Cut and separated so you can see where the cuts are. The blue and white will probably be cut again to create a triangle with the one on the right and depending on what I need, either a long strip or two math shapes I can’t remember the names of.
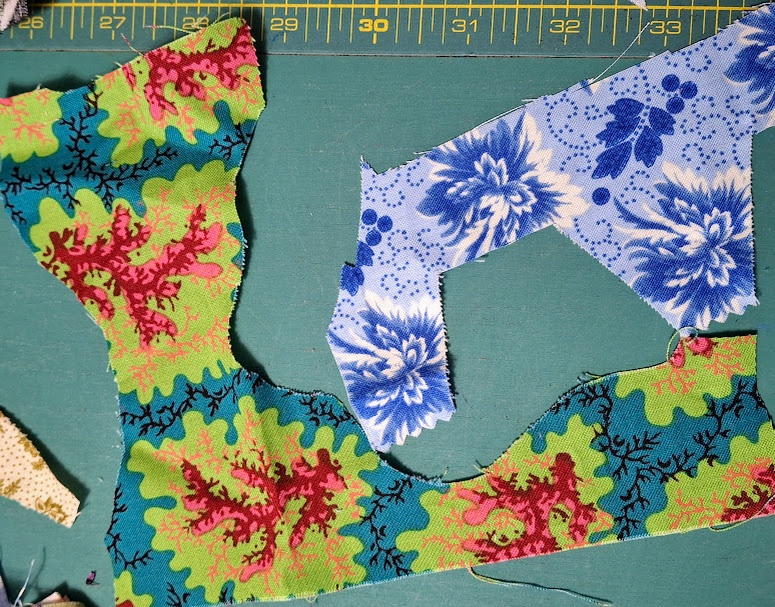
I simply cut the lime/blue in the skinniest sections. I still have a few options when recutting, but it won’t tangle up as easily. All of my cuts were made with my favorite scissors or the rotary. I don’t worry about straight cuts or finished pieces. The idea is to get them into bins. This lime/blue one went into the green bin, but it could have just as easily gone into the blue or red ones. It so happens that there were lots of blue scraps. There you go…my theory or method of scrap sorting. Very scientific and time-consuming.
Just for fun, here’s a post about how I organized my studio when it was first completed, and an old Sunday Quilt Inspiration from 2018 with lots of Pinterest photos.
-
5 Ideas to Be a Creative
In my last post (here) I mentioned that one of the things I’ve that I’ve been busy with is drawing. I use just plain copy paper and a pencil. Usually a dull pencil, at that. But I enjoy it very much and find that it a relaxing, creative enjoyment. So I’d like to share some of the drawings I’ve been working on.
I consider myself a creative person. Sometimes I’m an artist. Sometimes I’m a learner. Sometimes I can’t describe it myself. I do lots of things to encourage myself and thought maybe you would like to think about one or two for your own creative endeavors. Five things that help me be a creative:
5. Put the phone down. I love Pinterest, more than I should. I enjoy reading blogs and articles. Videos. Movies. Games. Whatever I can find on my phone. Almost. But all of those things are not calming. Electronics keep the brain in a frantic state. When I want to calm down, I lose the phone. Quiet.
4. Keep both hands busy. When I have down time, I have a favorite chair, like most people, but I’ve turned mine into a nest, of sorts. Somewhere in the “mess” (Richard’s term) are most of the things I need when I want to sit. Resting is sometimes difficult for me. Being still is impossible, but I’ve found that if I can keep my hands busy at a slower pace, my mind slows to the same pace. If I’m doing something calming, especially if it will have no effect on anyone, my whole self can slow down and be calm.
3. Have a variety of ways to keep busy. In my nest you’ll find drawing materials, small sewing projects, coloring materials, and a bit of scraps to embroider on. Each of these is “organized” into bags, boxes, and baskets. And, sure they are piled one on another (really, it is a mess) but they are readily available, which increases the likelyhood that I will pick something up.
2. Try new ideas. There are so many new things out there. Pinterest and the internet bring them to us in a flash. Occassionally, I pause to look at and analyze something interesting. If it’s not terribly complicated or just looks like something I might want to do, I start gathering the materials for another box. Sure, some attempts have gone sideways, but I am certain I’ve learned something from everyone. That alone, makes it worth trying.
1. Change things around. By this I mean that I may work on something for a couple of weeks. Maybe only a day or two. Regardless, when I finish a project I move on to a different type of activity. This helps me to avoid becoming bored. Not that I let myself worry if I decide suddenly, in the middle of a project, to jump to something different. UFOs don’t scare me now. (Although they did eons ago.) I occasionally put a UFO aside, work on a different project, then return to the unfinished project.
If you’ve made it this far, here’s a freebie: I also write. Often. Whatever comes to mind. In whatever manner or means. Sometimes it’s pencil and paper. Sometimes it’s this blog. Sometimes it’s in my head. What matters is that I do it. Often.
I hope these ideas for ways to be a creative person help you. Let me know in the comments if you already practice any of these or if you’re willing to try any.
-
Where to Begin? Good Question!
It’s hard to know where to start when you’ve abandoned something for a while. That’s what I’m facing right now. Four months down the road is a long time for a blog. Ah well, I’ll just begin here and catch you up as I go along. Maybe. Right? Maybe I’ll get everything down. Likely I’ll miss some things.
Daystar still in flimsy version So I did finish my Daystar quilt. I had put it on the longarm just before jumping out of the blogging business. If you read my last post here, you’ve seen and read most of this, but I need to catch up, too. As for Daystar, I love it.
I’m beginning to think that I love all my quilts, for a while anyway. Some more than others, but maybe that’s because I haven’t always worked in my improv style. And sometimes I force the effort, especially if I don’t like what’s happening.
I hope you can see the quilting lines. I’m loving these swirls and flowers and loops and, well, let’s just call it wild abandon. I basically create whatever I can come up with. I like to practice on paper by drawing out motifs that I can use, then keep those nearby while I’m quilting. For such a long time I drew individual ideas out on 3×5 cards, but those aren’t big enough for combining ideas. That’s my thing right now. You can see where I pick up ideas on this Pinterest board.
As I find something I like, I pin it here (or somewhere) then come back to the original when I want to draw my own ideas out. It helps to see the line shapes and curves, though I never seem to stick to the exact drawing. Isn’t that my style, though? Doing my own thing? Yes, I have to admit it is. I’ll eventually post a picture of Daystar and give stats on it. The weather is so horrible that I haven’t considered getting a real photo yet. Not that I haven’t had opportunities, of course.
-
Day Star Quilt Flimsy Complete (part 2)
In this post I told you about my most recent improv finish. It’s a scrap top in neutrals with a twist. That twist came about because while I like the calm of neutrals, this quilt wanted more. It wanted a wow! and didn’t have any of that. So I got to mulling and thinking and brainstorming. None of that worked very well until I remembered that at the Leesville class I had a couple of students working in greens and purples. One student in particular had these beautiful, jewel-tone fabrics in royal purple and deep green that I just fell for.
It turns out that I don’t have many of either. I had to dig deep, in the far-back spaces of that horde I call “my stash.” (Really, it’s insane.) Nevertheless, I managed to find one or two suitable fabrics. What brought on the star idea, I cannot say. But I spent most of one day just working out the stars. They needed to be wonky. Not too big (it turns out). In fact, the skinnier they got, the more I liked them. Maybe I was doing that positive transference thing in which a person directs what she wants onto herself. Or something. I digress. The skinny stars are the ones I like. I wish I were skinny. There.
Anyway, it took a while to figure out where the stars go, and how many to put in and how to fit them in with the neutral stuff. Then I spent most of a day ripping and moving things around. Eventually I just told myself to get over it and move on. It’s not quilted yet, so maybe…
Day Star Quilt It’s likely, this is what will be. But I’m not sure I have enough stars. Maybe one or two more small ones? What do you think?
-
Pin It Weekly #365 Red and White

‘Nearly Insane’ Quilt – August 2015 Welcome to PIW, the week of red and white quilts! I have over 60 quilts on the “red and white” section

“Red December” by Gail Smith quilted by Angela McCorkle of my “heart, quilts” board. This is just a small taste.

Gwen Marsden quilt 
Pieced by Audrey Hill Quilted by Jessica’s Quilting Studio 
Harrison Rose 
Das Muster für diesen Quilt stammt aus einem Buch von Judy Martin und heißt dort ‘Shakespeare in the park’. 
Lisa Martin “1906” Red and White Blue Ribbon WA State Fair Traditional quilt. 
sotakhandmade.blogspot.com 
Apologies, I was not able to find information on these last two, but they are too pretty to not include. Of course, choosing is always so very difficult! Here’s a link to the last Pin It Weekly.

-
Pin It Weekly #364 Butterflies and Flutterflies
It’s spring in Louisiana. We have spotted a couple of hummingbirds and see butterflies on almost every walk we take. Meme calls them “flutterflies” everytime she sees one. The butterflies are mulitplies quickly and haven’t even found the wildflower gardens that Richard and Adam planted earlier when things were just beginning to green up. Right now the cosmos are absolutely darling. The next two pictures are of Adam’s garden.
Look at the variety of leaves! I have been trying to identify the plants but, I’m afraid they will have to bloom. But we’re supposed to be checking out butterflies, so let’s get to it! Here’s the link to my “butterflies moth caterpillar” board.


Okay, so maybe some of these are moths. I do know the difference but am working in a time crunch. So I’ll leave you to determine what is what. One final link, to last week’s WIP on abstract art. Thanks for visiting!
-
Pin It Weekly #363 Abstract Art
Lots of insipiration in this post of abstract art and how it can inform modern quilting. I’ve been thinking about the theme for my modern guild round robin.

We’ve mentioned it at the last couple of meetings, and someone has stepped up to chair it, so it’s coming soon. I’m excited! Especially since abstract art has been on my mind and I’ve added to this board.


Thinking about the ones we did last year, the quilt influenced by the seasons was a fun one to work on. Now. At the time I struggled. But I persisted and the end result works beautifully with the rest of the quilt. The truth is I enjoyed them all.
Perhaps my favorite was one influenced by Wassily Kandinsky, a Russian painter and art theorist, who was instrumental in the abstract art movement.

While I like his paintings, I’m thinking of going with something softer and more contemporary. Of course, there’s no telling where the work will go in terms of creativity.

The only thing I can do is start the first round with something abstract, suggest it, and enjoy the result. In that order.

I have found an artist whose work I really enjoy, Simone Braun. Perhaps with a little more research, I’ll have found my inspiration. What do you think?
Abstract art from Simone Braun -
Pin It Weekly #362 Ten Map Quilts

I’ve been thinking of map quilts for a few weeks now. I don’t know what does that….put my mind on a subject. I do know that when that “on a subject” occurs, I am stuck with it for a while.


Links to continue your reading and viewing.
These map quilts are all on my “maps” category in the “heart, quilts” board. I hope it inspires you to create a map quilt of some form. Writing this post certainly has me more intrigued. Also here’s a link to my last PIW post. Have a great week everyone!
-
Pin It Weekly #361 Ten Quilts
I got curious a few days ago about what I’ve been pinning lately. Hmm, can you imagine that it’s been mostly modern quilts? Yep! Here are the last ten that I pinned. Of course, there have been many more. After all, it took a few clicks to build “heart, quilts.”


-
Pin It Weekly #360 Happy Dr. Seuss Day
I’m not sure when Dr. Seuss Day actually is, but Meme’s school is celebrating tomorrow. Of course, Dusti enlisted me to make a Sneetch costume. I did not even know there’s a book! Happily, Dusti is current on Dr. Seuss and picked up everything we needed.

A yellow shirt and yellow pants and yellow shoes. Do you see a theme here? I had only to add a green star and a green hair bow. Done and done.
And just like that (finger snap, please) Meme is ready for Dr. Seuss Day. I won’t see her for several days, so I didn’t get a picture of my sweetiepie in her costume. We’ll have to be happy with these photos of my handiwork.

And to celebrate Dr. Seuss here are a few more pins from my “Dr. Seuss” board. Oh, I loved reading these books to my children when they were little. Naturally, the silly rhymns were right up my English alley.


And, because PIW always ends with pins of quilts, here are a few Dr. Seuss themed quilts to inspire you.


Here’s a link to Pin It Weekly #359. Hope you enjoy!


