My stained-glass quilt workshop requires bias tape to create the illusion of leading between the pieces of fabric “glass.” I generally use two sizes of bias when making a stained-glass quilt, but you can used only the larger bias. A half inch bias works well for the longer stretches of coverage. It’s wide enough to catch the edges of the cross pieces and gives the work some heft. For the shorter stretches of coverage, where the “glass” pieces are small, a quarter inch bias is better because it gives space for the small pieces to breathe. There is one caveat, however. The thinner bias tape takes more care to fully cover the edges of the glass.
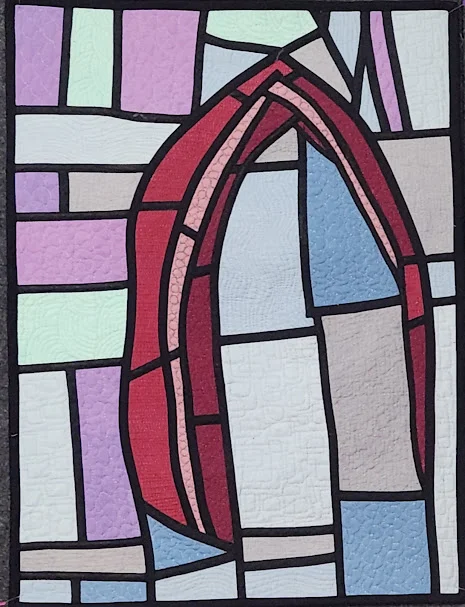
For the stained-glass quilt make your bias tape from solid black fabric. I like a thin or open-weave fabric because it is easier to manipulate. Begin by cutting the strips on a 45-degree angle. This is especially important if you will have curves in the quilt. A bias tape will bend and conform to those curves, although tight curves make take a bit of finagling.
Making the bias tape
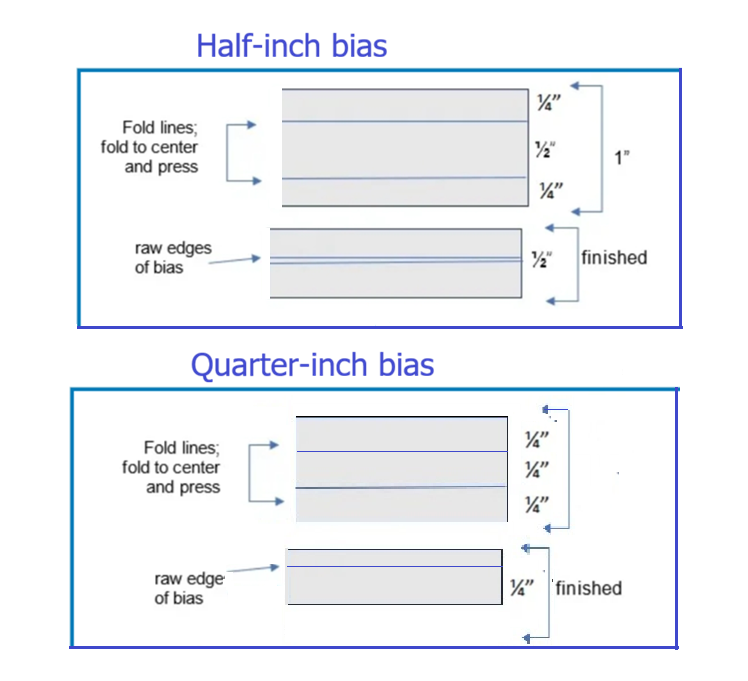
The process for making either size is virtually the same. The main difference is that you start with a one-inch strip for the 1/2″ finished bias and a three-quarter-inch strip for the 1/4″ finished bias. In both cases, the fold is 1/4″ from the long edge of the strip. There are many bias makers available, but it is possible to carefully fold and press by hand. The larger bias is quite straightforward: fold it in half to find the center width. The fold each side in until they touch in the center of the bias.
Making the quarter-inch bias