I’ve been quilting on the longarm this week and had high hopes of finishing by today. Thursday, I pushed myself to get extra blocks done. Okay, so the thread broke once. Then the bobbin needed winding. I just dealt with the little inconveniences and moved on. Ahh, the joy of quilting without big interruptions.
Then, I noticed something: a little bit of puckering where the fabric was larger than the patch should be. I had a fix. Simply quilt more in that area. Ahh, the joy of improv quilting.
https://i.ytimg.com/vi/xkSO-2ZVwJc/maxresdefault.jpg
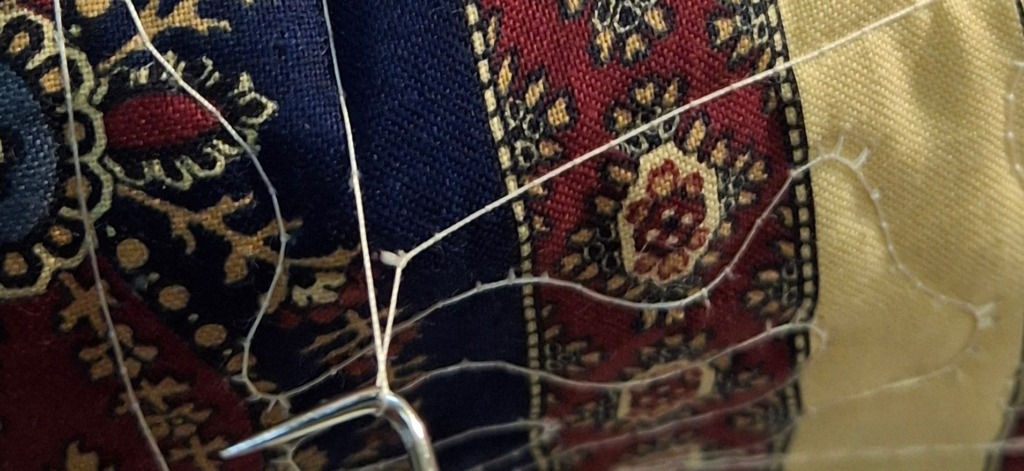
One stitch on the top thread was loose. Hmm. I checked the bottom thread on the edge where I started, and all was good. Okay. Until. Another top stitch was loose. Not a coincidence. I checked the bottom thread on the opposite side of the quilt and there were eyelash stitches. Aww, man! Okay. It’s not such a big deal.
It was, indeed, a big deal. Every stitch I made from the time the thread broke until I finally stopped. Every stitch. All of them. Yards and yards of thread. A least an hour of stitching. It really deserved a bad word or two. But I had an idea which, well, I may as well try it out. I hope this photo tutorial helps you, also. Though I do not wish that you’ll have a need to try it.
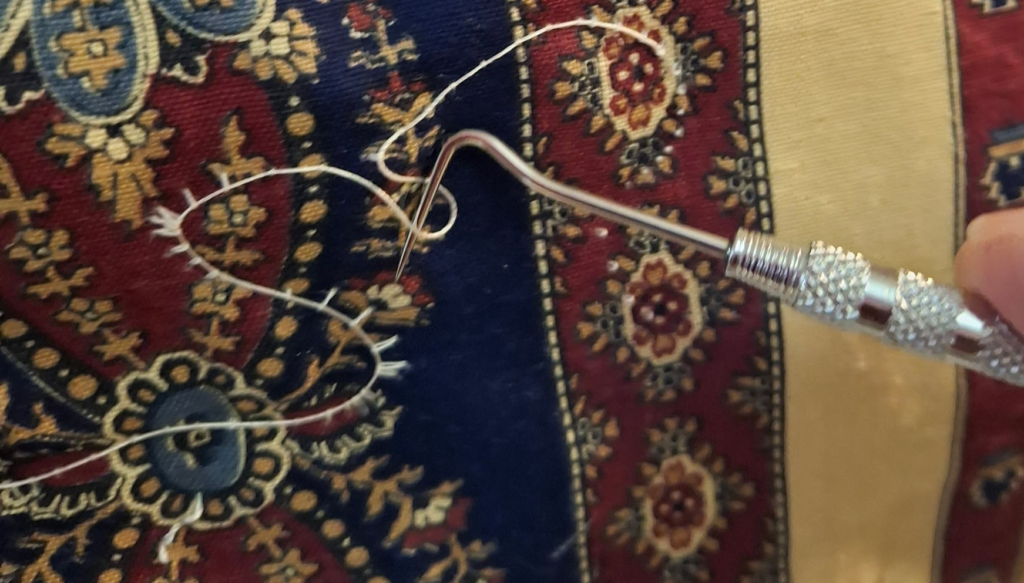
My process started with the discovery that the section was larger than I could reach, even if I crawled under the longarm. First, I took the bottom of the quilt off the rail and rolled it on top of the other rails. This gave me a way to access the stitches. It also gave me a closer look at how many more stitches needed to be ripped. Many more. Many, many more.

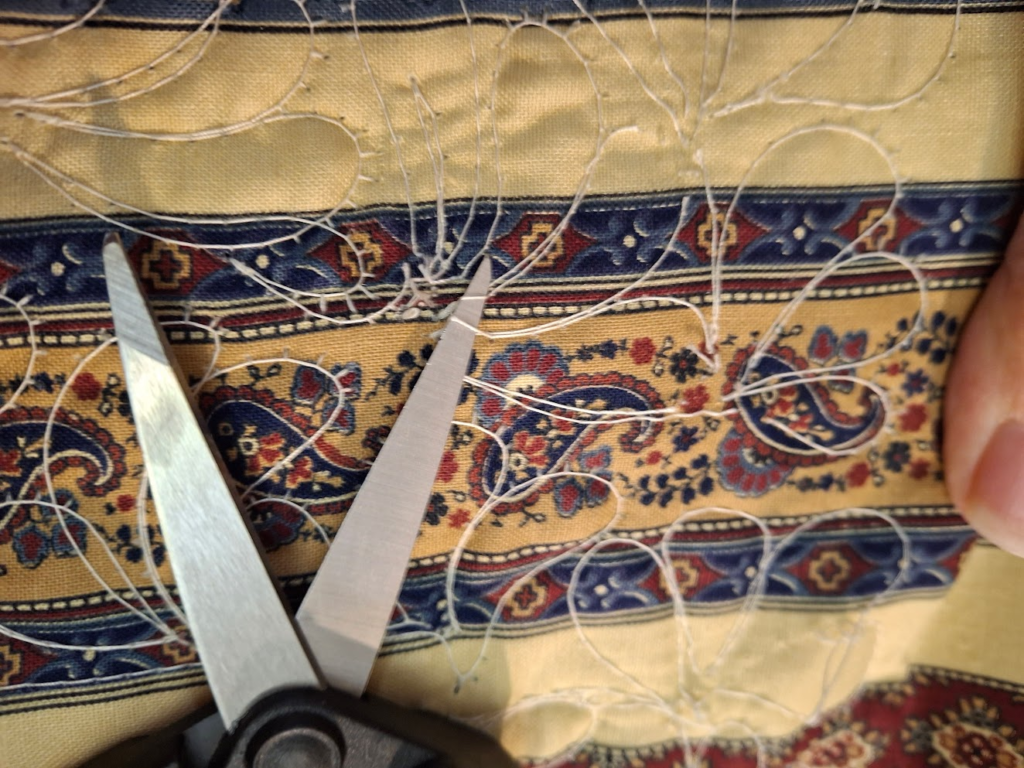
I worked in sections to cut the bobbin thread where the stitches made hard V-shapes. Long, straight stitches could be clipped at the ends where there were L-shaped turns. This allowed the seams to come out with my new-fangled tool. Ripping stitches, yay!
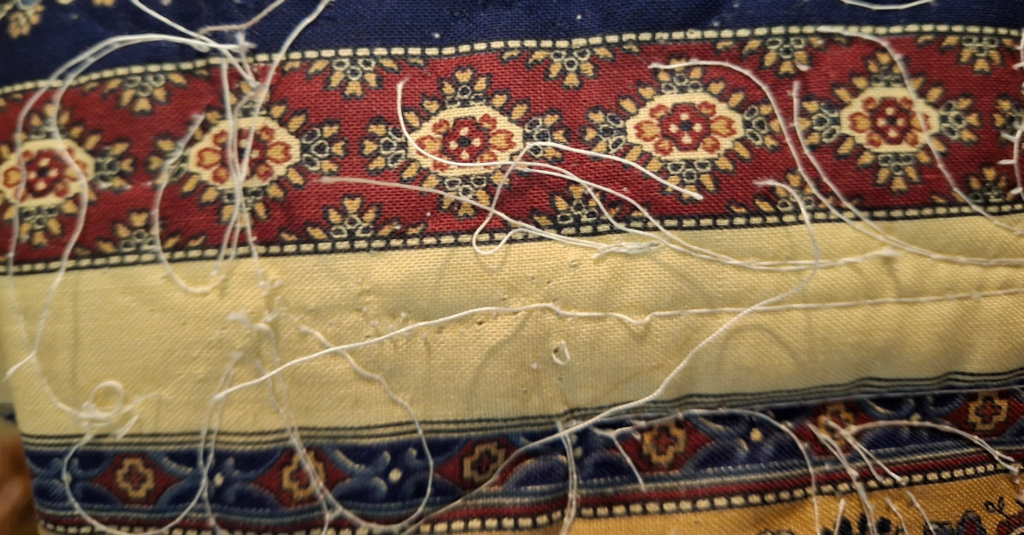
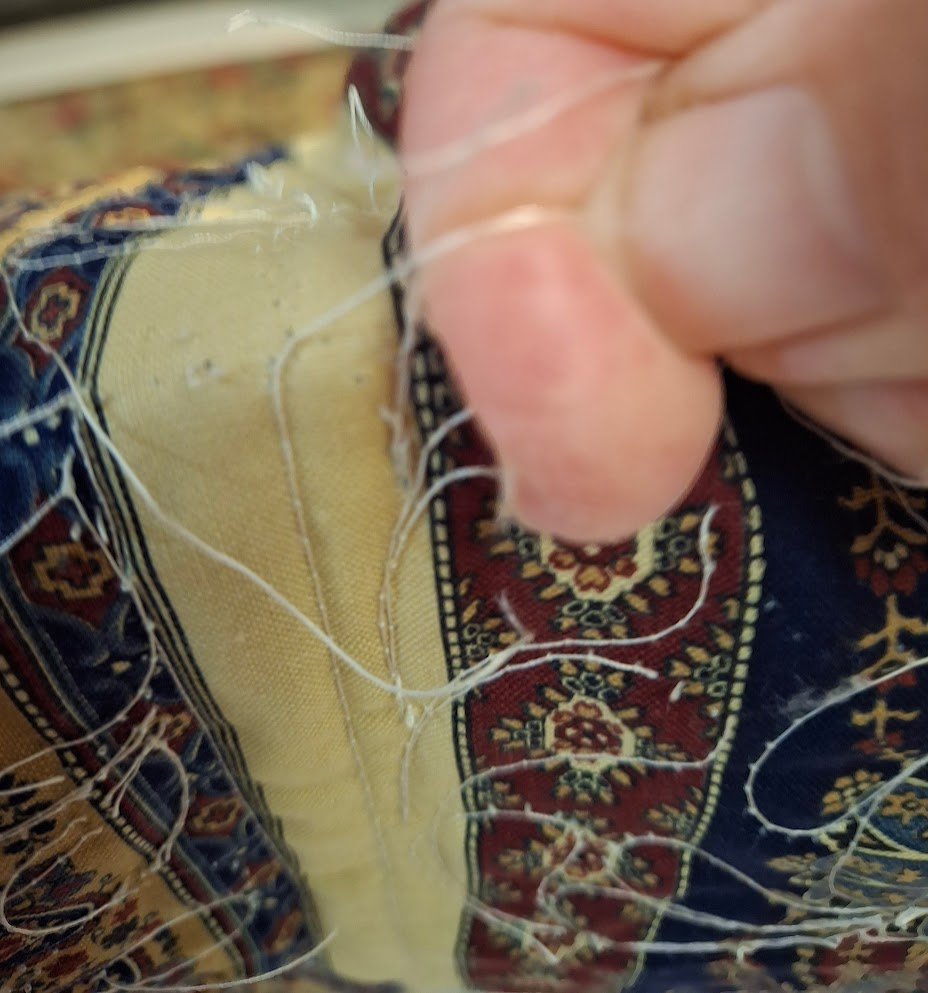
This is the process, my friends. It’s a time saver, but if you have a whole row of blocks to rip out, well, nothing saves you from three hours of cutting, picking, and pulling. But it does leave you with this.
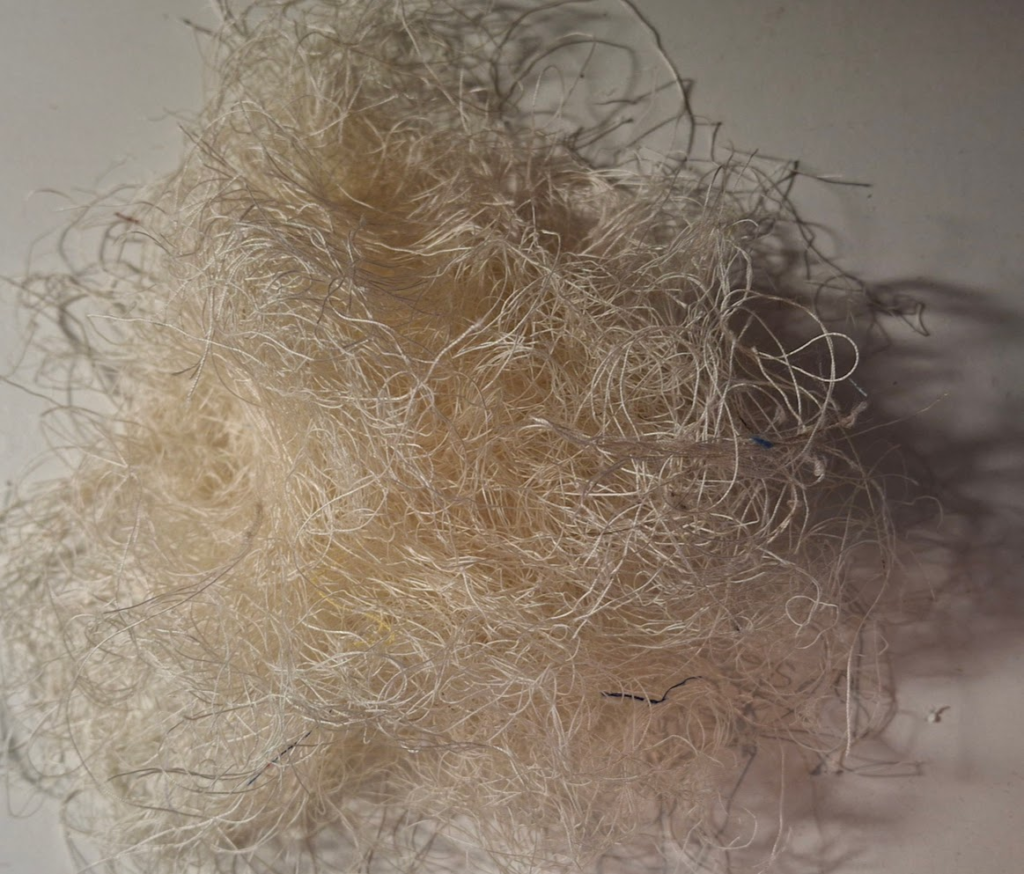
And now, so as not to leave you with this depressing (though now complete) image, I recommend this post from last August.